Unknown's avatar

About Jenny

I love reading, quilting, backpacking, and photography.

Quiet Book Cover and Binding (Updated with more Pictures)

qb cover

*Update: I have also helped a friend bind hers now, and you can see an easier version of completing and binding the exchanged pages HERE now.

Here is my cover. It is a little big for the pages, but I’m still happy with it. My kids begged me to play with this, but I only let them play with it on Sundays, so it won’t get worn out too fast.

qb finished

If you ever want some practice binding and doing mitered corners, just decide to bind every page of a quiet book with your binding scraps. While it was a lot of extra work, I loved the way these page edges turned out.

Inner spine details…
completed quiet book (1)sm

I got the grommets and loose leaf rings at Amazon (click the link to go to a page of them). The grommets are half inch, though you could easily go smaller, and the book rings are 2″, which seemed large to me at first, but with the thickness of bound pages, it is a great size.

completed quiet book (2)sm
Outer spine detail…
completed quiet book (14)sm

completed quiet book (4)sm

completed quiet book (10)sm

completed quiet book (5)sm

completed quiet book (6)sm

completed quiet book (7)sm

completed quiet book (8)sm

completed quiet book (9)sm

completed quiet book (11)sm

completed quiet book (13)sm

One word of warning: if the kids get too excited, it’s not actually that Quiet of a Book. I was shushing them quite a bit during church when they were playing with it because they both wanted it to themselves.

Binding my Quiet Book

Right now I am working on binding my book. I was going to sew the pages right-sides together and then turn them inside out, but someone mentioned using normal binding for them. I have so many scraps of binding, and I love scrappy-looking anything, so I am binding.

qb rings

I bought some 2″ book rings, and tent/tarp grommets, and went to work. I have a few notes for if I ever work with grommets again:

* The hole punch that came with my grommets didn’t work on a cutting mat, but a scrap of carpet or felt underneath helped it make a small cut. Then I used scissors to finish the hole.

* Hammer lightly at first, and be careful to hold the top applicator straight at a 90 degree angle. I hammered really hard at first, and the grommet edge cut the fabric edges around them. I recommend trying a few test ones before doing it on the actual product.

* Half inch grommets are pretty big, but for 12″ pages with brightly colored binding, it doesn’t look too bad. I would like to check a hardware store next time. I just ordered them on Amazon this time.

* If I make another book I might also try reinforced button holes. You sew the buttonhole like normal, except include a small piece of cord that gets sewn into the satin-stitched edge of the hole. I only know about these from the classes that came with my sewing machine. I love those Bernina people.

Quiet Book Exchange

Our deadline for the quiet book was Wednesday this week, so we got together at my house and exchanged.

qb1

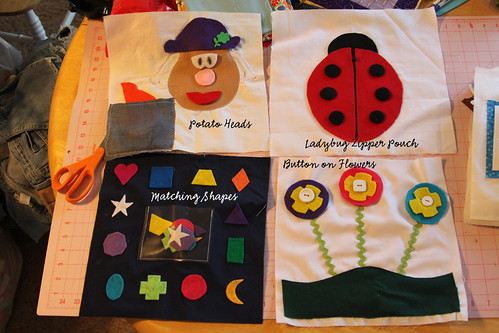
Check out all of these awesome pages.

pages3

pages2

pages1

My husband thinks it would be amusing to cut little gray rectangles out of felt so that the truck could go on blocks, too, if we want, since the tires all come off the buttons and go in the pocket.

qb4

The laundry page was mine, as you may have noticed. I asked one of my friends to do the paper doll page so she could put the clothes in my basket, and I could make clothes that would be fun to play with on two different pages. I LOVE how this entire project turned out.

After everyone left, I went through my stack of pages and played with each one, and I had the most juvenile grin on my face. You couldn’t wipe my smile off with a whiny three-year-old. I have ordered grommets and book rings so I can bind it that way. Then I can unclip and let each kid have a few pages at a time. I am totally doing this again next year, though. I would love to have a book for each child, and this method would make it so attainable.

How to Weave Felt

I have taken a break from making my own quiet book, and I have joined a quiet book exchange. Each member makes 15 of a specific page. We all do a different page, and then exchange so we have a complete book. I love the efficiency of this method.

I am doing a laundry page with little clothespins, and a basket, and I am going to work with a friend who will do a felt doll page, and some of the clothes. I thought I would post the process of weaving the felt for the basket. I learned this trick from the pie-making page of my Better Homes and Gardens cookbook, so you can do this with felt, or pie crust.

basket weave (1)-web
Lay out your horizontal felt strips.
basket weave (2)-web
Place your first vertical strip underneath every alternating horizontal strip.
basket weave (3)-web

Now, fold back (to the left) the strips that are underneath your first vertical strip.

basket weave (4)-web

Then place your next vertical strip next to your first one, snugging it as close as you can.

basket weave (5)-web

Replace the strips you folded back earlier.

basket weave (6)-web

basket weave (7)-web

Now fold back the strips that are underneath vertical strip 2.

basket weave (8)-web

And place vertical strip 3.

basket weave (9)-web

Replace the horizontals again.

basket weave (10)-web

Lather.

basket weave (11)-web

Rinse.

basket weave (12)-web

Repeat.

basket weave (13)-web

Trim.

basket weave (14)-web

Stabilize with your best friend, Pellon.

basket weave (15)-web

And place on your page. (Or pie.) You did it! I’ll post a picture of my page when it is done. My mini-clothes pins are so cute. I can’t wait to make some little felt clothes to pin. You can get the pins on Amazon.com or from a craft store. The shipping on Amazon made them about twice as expensive as my local store, Roberts.

Easy Baby Boy Quilt

I am not going to take the trouble of explaining how to sew this quilt, because it is so easy that you can just look at it. I picked a fabric I just loved cut it in six inch strips, and then I grabbed 6″ scrap strips from my stash to fill in for a striped quilt. This is for my sewing buddy, who just gave birth two weeks early and is therefore now excused from producing anything else other than a mostly clean, fed child for the next six to twelve months.

I used my water soluble pencil and drew this robot on one stripe (because she and her hubs are geeks like my hubs and me),

lori m fall 2011 (8)

And this boat on another stripe,

lori m fall 2011 (4)

Then I used my walking foot to stitch the ditches and halfway points, then I free-motion quilted my two little drawings. I bound it with scraps of binding from my bag o binding scraps. I like to think I could have finished that by her due date if I had been allowed to do so. Easy peasy!

lori m fall 2011 (6)